
Refinishing a dining table breathes new life into a central piece of your home, preserving its charm and functionality. This article will guide you through the process, starting with the reasons why refinishing is beneficial. Next, it outlines the necessary tools and materials before providing a detailed, step-by-step guide on how to refinish dining table. Whether you’re tackling this project for the first time or looking to perfect your technique, this comprehensive guide ensures a smooth and successful refinishing experience.
Why Refinish Your Dining Table?
Refinishing your dining table brings numerous advantages that make it a worthwhile investment. This process offers practical and aesthetic improvements to your dining space. Here are several benefits:
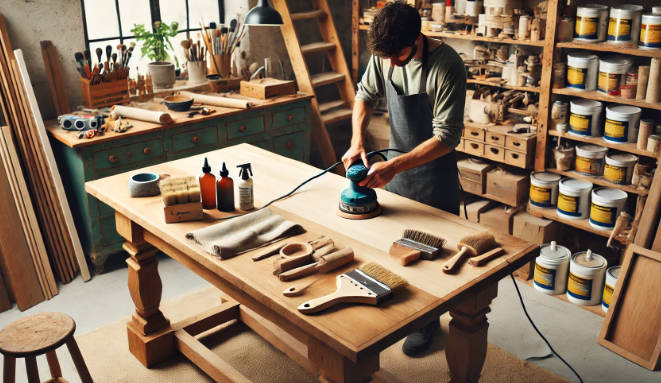
Tools and Materials Needed for Refinishing a Dining Table
Refinishing a dining table can breathe new life into an old piece of furniture. To achieve the best results, you need the right tools and materials. Here’s a comprehensive list of what you’ll need:
Tools
Materials
Step-by-Step Guide to Refinishing Your Dining Table
Refinishing your dining table can breathe new life into an old piece, transforming it into a stunning centerpiece for your home. Follow these steps to achieve a professional-looking finish that will impress your family and guests.
Step 1: Stripping the Old Finish Using a Chemical Stripper
Stripping the old finish from your dining table is the first step in the refinishing process, and using a chemical stripper makes this task much easier. Begin by selecting a high-quality chemical stripper that suits the type of finish on your table, whether it’s varnish, paint, or lacquer. Ensure your workspace is well-ventilated and cover the surrounding area with drop cloths to protect from spills.
Wear protective gloves and safety goggles. Apply the chemical stripper generously with a brush, following the manufacturer’s instructions. Allow the stripper to sit for the recommended amount of time, usually around 15-30 minutes. You’ll notice the old finish bubbling up and loosening from the wood.
Using a plastic scraper, gently remove the softened finish, taking care not to damage the wood underneath. For intricate areas or stubborn spots, use a steel wool pad or a stripping brush. Once all the old finish is removed, clean the table with a damp cloth to remove any residue.
Step 2: Sand the Surface
After giving your table ample time to dry, it’s time to sand the surface. If you’ve already removed the old finish with a chemical stripper, this step should be relatively quick. The condition of your table’s existing finish will determine the starting grit of your sandpaper. If your table had only a single layer of finish like mine, beginning with 150 grit sandpaper and finishing with 220 grit should suffice. However, for pieces with more residual finish, start with an 80 grit and then progress to 150 and 220 grits.
Using an orbital sander, sand in the direction of the wood grain. For my table, this revealed a fascinating wood grain pattern that I hadn’t noticed before. Pay extra attention to the table’s edges and legs, which may require hand sanding to avoid damaging intricate details. My table, for instance, had beautifully curved edges and legs that I was careful not to alter.
As you sand, you might discover different types of wood used in various parts of your table. My tabletop was red oak, the legs were poplar, and the skirting was a veneer. Each material sands differently, so proceed with caution to avoid over-sanding any particular area.
Step 3: Select a New Finish
Selecting a new finish for your dining table is an exciting step that allows you to customize its look to match your style and decor. Start by deciding between staining and painting. Stains enhance the natural beauty of the wood, bringing out its grain and character, while paint offers a more uniform and versatile appearance.
If you choose to stain, consider the color and type of stain that will best complement your space. Water-based stains are easy to clean up and dry quickly, while oil-based stains penetrate deeply and provide a rich, lasting finish. Test a small, inconspicuous area of your table with your chosen stain to ensure it achieves the desired look.
For a painted finish, select a high-quality paint suitable for furniture. Chalk paint is a popular choice for its matte finish and ease of use, while enamel paint offers a durable, glossy surface. Again, testing a small area first is wise to see how the color looks on your table.
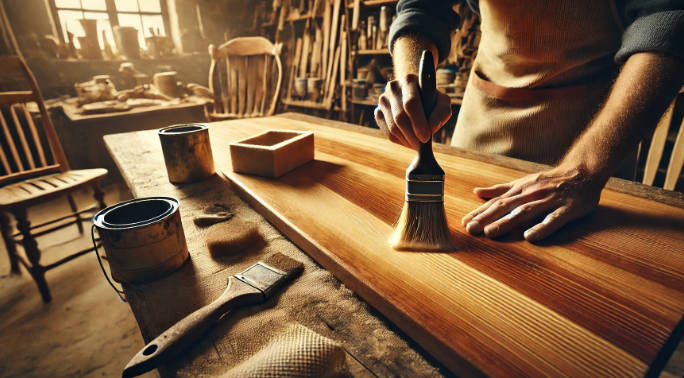
Step 4: Seal It Up
Sealing your table is the final step to protect the newly applied finish and ensure its durability. Choose a high-quality sealant that matches your finish type, whether it’s polyurethane, lacquer, or a water-based topcoat. Polyurethane is a popular choice for its durability and resistance to moisture and heat.
Using a clean brush or a foam applicator, apply the sealant in thin, even coats, following the wood grain. Allow each coat to dry thoroughly according to the manufacturer’s instructions, typically around 24 hours. Lightly sand between coats with fine-grit sandpaper (320 grit or higher) to remove any imperfections and ensure a smooth, professional finish.
For added protection, consider applying two to three coats of sealant. This layering will provide a robust barrier against daily wear and tear, ensuring your dining table remains beautiful and functional for years to come. Once the final coat is completely dry, your refinished dining table is ready to be enjoyed, showcasing its renewed beauty and craftsmanship.
Conclusion
Refinishing your dining table can breathe new life into your dining area. Take the time to gather all necessary supplies, work carefully through the instructions on how to refinish dining table, and soon you’ll have a table that looks brand new. Feel free to share your experience and results, and inspire others to take on this satisfying project.
FAQs
Is it worth refinishing a table?
Refinishing a table can be worth it if the table is of good quality, has sentimental value, or fits well in your space. It can restore its appearance and extend its lifespan, often at a lower cost than buying new. However, it requires time, effort, and sometimes professional help, so weigh these factors against the table’s value to you.
Is it easy to refinish a dining table?
Refinishing a dining table can be moderately challenging, depending on your skill level and the table’s condition. It involves stripping the old finish, sanding, applying new stain or paint, and sealing. With proper tools and patience, it’s a doable DIY project, but for intricate designs or severe damage, professional help might be needed.