
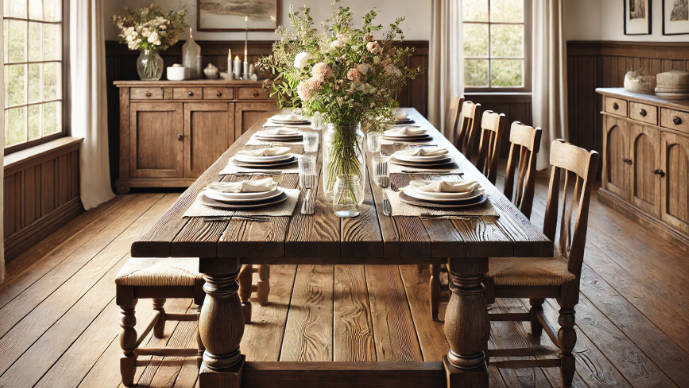
Transform your dining area with a rustic touch by building your very own farm dining table! With just a few tools and some DIY spirit, you can create a charming centerpiece that brings the countryside straight to your home. In this article, you can learn how to build a farm dining table by selecting the perfect wood, measuring and cutting with precision, and assembling your masterpiece step by step. Let’s start building and bring that country charm to your dining room!
Benefits of Building Your Own Farm Dining Table
One such project that can significantly enhance your living space is building your own farm dining table. Let’s explore the benefits of building your own farm dining table.
Customization to Fit Your Space
One of the biggest advantages of building your own farm dining table is the ability to customize it to perfectly fit your space. You can adjust the dimensions to accommodate your dining area, ensuring it doesn’t overpower the room or feel too cramped. Customization also extends to the style and finish, allowing you to choose a design that complements your existing décor.
Quality and Durability
When you build your own farm dining table, you have full control over the quality of the materials used. This means you can select sturdy, high-quality wood that ensures the table’s durability. Unlike mass-produced furniture, which might skimp on material quality, your custom-built table will be a solid piece designed to last for generations.
Cost-Effective Solution
Building your own table can be significantly more cost-effective than purchasing a pre-made one. While high-quality farm dining tables can be expensive, constructing one yourself allows you to select affordable materials and avoid the markup that comes with retail furniture. Plus, you can invest in durable materials that will stand the test of time without breaking the bank.
Environmental Benefits
Building your own furniture allows you to make environmentally conscious choices. You can opt for sustainable materials, such as reclaimed wood, reducing your carbon footprint. Additionally, by creating a durable piece, you are contributing to a reduction in the demand for mass-produced, often disposable, furniture.
Personal Satisfaction and Achievement
There’s a unique sense of satisfaction that comes from building something with your own hands. Completing a DIY farm dining table project not only boosts your confidence but also gives you a tangible reminder of your skills and hard work. Every meal shared at the table will be a testament to your craftsmanship and dedication.
Materials and Tools Needed
Before diving into the construction of your farm dining table, it’s essential to gather all the necessary materials and tools. Here’s a comprehensive list to guide you.

How to Build a Farm Dining Table: Step-by-Step Guide?
Building a farm dining table from scratch is a satisfying project that combines creativity and craftsmanship. Here’s a detailed guide to help you through the process.
Step 1: Planning and Gathering Materials
First, we experimented with various heights with an adjustable office chair until we discovered a compromise that worked for both of us. This measurement became the norm for the height of our benches. The ideal tabletop height for our requirements was then determined by simulating a tabletop with a flat piece of wood. Remember that these measurements can change based on personal tastes!
With our crucial dimensions established, we moved on to sketching our design. Creating detailed plans is incredibly beneficial as it ensures nothing is overlooked and helps track the size of each component. We made sure to sketch the table from both a top-down and a side view perspective, which proved to be an invaluable reference during the material acquisition and assembly stages.
Step 2: Crafting the Tabletop
After completing the benchtops, we felt ready to tackle the tabletop. We meticulously arranged the boards in various configurations to achieve the best appearance and most even fit. Once satisfied, we numbered each board and marked the spots for the Kreg Jig screws, ensuring they were spaced six inches apart, alternating sides.
We drilled the pocket holes on the underside of the tabletop to maintain a clean surface. Next, we positioned and trimmed the breadboards for a snug fit.
With all pieces labeled, we drilled the Kreg Jig holes and began assembly. Starting from the middle, we worked outward, alternating sides. Each board received a dab of glue and was secured to its neighbor with screws in the center. After completing the main planks, we attached the breadboards for a tight fit.
Next, we put the 2×4 underframe of the tabletop together individually on a level surface using
Kreg Jig screws and glue. The entire length of the tabletop was supported by two long, 2x4x10s that had been trimmed to 111″ in length. Crosspieces connected the planks and gave support to the base centerpiece. After making sure everything was level and square, we fastened the underframe to the tabletop’s underside.
The underframe was crucial for structural integrity, providing a secure attachment point for the base and preventing warping. With everything prepped and on a level surface, assembly was quick. Excess glue was wiped away, and the tabletop was left overnight to dry.
Step 3: Constructing the Base Crosspieces
Starting with the horizontal parts of the crosspieces, we glued and screwed pine planks to cedar posts. After the horizontal portions were positioned, we used extra glue and 4-inch screws that were driven deep for rigidity to attach the vertical 4×4 posts at the top and bottom.
The four diagonal 4×4 pieces were then added. These were attached to the horizontal parts at the top and bottom using the same technique, and they were glued and screwed straight into the middle post. For a smoother finish, we subsequently used wood filler to fill the screw holes; however, this step is not required.
Step 4: Building the Center of the Base
To create the centerpiece of the base, we utilized straight-cut 4×4 cedar for the upper and lower sections. The diagonal supports were crafted from 2x4s, each end cut at a 45-degree angle to fit securely. These supports were then fastened to the center of the 4x4s with screws, following our detailed plans.
The vertical members were then positioned and secured with adhesive before the 4x4s were screwed through the face. We drilled 4-inch screws deeply from the top and bottom to offer extra strength and ensure a strong and durable connection.
Step 5: Sanding, Staining, and Finishing
We started by thoroughly sanding all surfaces with 150-grit sandpaper. An old electric sander helped remove stamped writing from the wood, but this step can also be done by hand.
Next, we applied a pre-stain conditioner and let it dry for about two hours. Using clean, old rags, we then applied the stain, letting it sit for about ten minutes before wiping off the excess. To reach difficult corners, an old paintbrush proved useful. We allowed the stain to dry overnight. To finish, we applied a matte topcoat for a smooth, sheen-free surface.
Step 6: Assembling the Base Brackets
We began by spray-painting the bolts and brackets with matte black metal paint for a sleek finish, although this step is optional if you prefer the natural metal look. Once dry, we positioned the brackets on the base centerpiece and marked the holes on both sides.
After marking, we drilled through the wood, ensuring the holes aligned perfectly on both sides of the 4x4s, then secured the brackets with bolts. With metal brackets on each side, we only used washers on the outer sides for stability.
Next, we positioned the crosspieces and centerpiece upright, ensuring everything was square, level, and securely fitted. We marked the bracket hole locations on the horizontal members of the crosspieces, disassembled everything, and drilled the marked holes.
Step 7: Assembling the Final Table
With the tabletop, base crosspieces, and centerpiece prepared, we relocated everything to the dining room for the final assembly.
We started by positioning one of the base crosspieces upright and securing it to the brackets on the base centerpiece. This allowed the base to stand on its own, simplifying the attachment of the second crosspiece. Thanks to our careful pre-measuring and squaring before drilling, tightening the bolts with a socket wrench ensured the base was perfectly aligned and level.
Once the base was securely in place, we gently lifted the tabletop and set it on the base.
To firmly attach the tabletop, we used five 4-inch screws, driving them through the horizontal members of the base. We placed one screw in the center of the centerpiece and one on each side of the crosspieces’ center posts. To ensure precise depth for the screws into the 2×4 frame, we marked the drill bit with electrical tape.
Conclusion
The building process, while requiring some effort and tools, results in a unique piece of furniture that reflects your style and craftsmanship. By learning how to build a farm dining table, you’ll gain valuable skills and the satisfaction of creating something with your own hands. So gather your materials and get started on this fulfilling endeavor. Once completed, your farm dining table will stand as a testament to your hard work and creativity, providing a central place for family and friends to gather and create memories.