
When you learn how to build a dining room table, you’ll realize it’s an achievable task with the right preparation and tools. Imagine crafting a table that perfectly matches your unique style, from rustic farmhouse vibes to sleek modern lines. These comprehensive instructions will guide you through each phase of the project, from gathering the necessary materials to the final touches of assembly. Try to create a stunning centerpiece for your dining room.
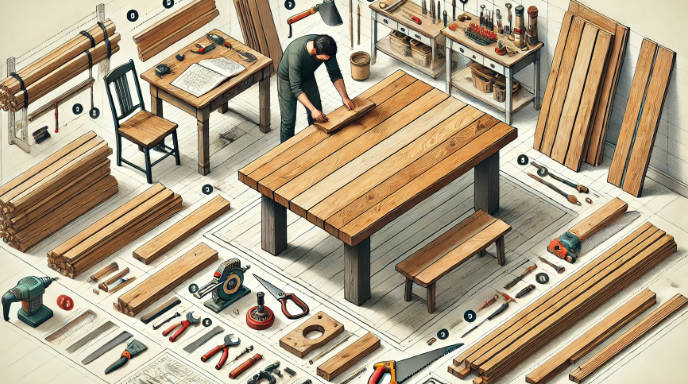
Materials and Tools Needed
Building your own dining room table can be a rewarding project that adds a personal touch to your home. Here are the materials and tools you’ll need to get started:
Materials:
Tools:
Instructions for Building a Dining Room Table
Now that you have all the materials and tools ready, it’s time to dive into the step-by-step instructions for building your own dining room table. Follow these guidelines to create a stunning piece of furniture.
Step 1: Building the Table Legs
1.You’ll need to glue and clamp the boards together. Start by laying your first board flat and applying a generous amount of wood glue on top. Place the next board on top of the glued surface and press firmly. Repeat this process until all the boards are stacked together.
2.Clamp the stack securely. Use as many clamps as you have available, ensuring even pressure across the entire stack. If you have heavier items, place them on top to add additional weight and enhance the bonding process. Leave the clamped boards undisturbed for at least 24 hours to allow the glue to set completely.
3.After the glue has dried, carefully remove the clamps. Sand all four sides of the now solid piece until they are smooth and even. Then, cut the long piece into four equal lengths to form the table legs. Sand the ends of each leg to ensure they are smooth, then set the legs aside for the next step in your project.
Step 2: Constructing the Table Top
1.Begin by creating sturdy panels by sandwiching each of your 1×16 and 1×6 boards together. This will transform them into thicker, more robust pieces resembling 2×16 and 2×6 boards. Apply wood glue between each pair of boards, clamp them securely, add weight, and let them sit for 24 hours. Depending on the number of clamps you have, you may need to do this in stages.
2.After the glue has set and you remove the clamps, focus on the 1×16 boards. Drill several pocket holes on the underside of these boards to prepare for joining them together. Be mindful not to place pocket holes where you might later cut.
3.Apply wood glue along the edges of the three 1×16 sections and clamp them together to form your table top. It’s crucial to ensure the boards are level during this step. Large clamps are particularly useful for this task.
4.While the glue is still wet and the boards are clamped, insert the pocket screws into the holes you previously drilled. This is a critical step for achieving a level surface, so take your time to get it right.
5.Once the glue has dried, remove the clamps and plane or sand the ends of the tabletop until they are smooth and even.
6.Next, you’ll add the 6-inch end pieces. Measure the width of each end of your table top carefully, then cut your 2×6 boards to match these measurements. This is why a 10-foot board is recommended, as it provides extra material to work with.
7.Drill pocket holes on the underside of each 6-inch end piece. Apply wood glue to the ends of the table top, clamp the end pieces in place, and secure them with pocket screws. Let this assembly sit for 24 hours to ensure the glue sets properly.
8.Finally, remove the clamps, and your table top is now taking shape!
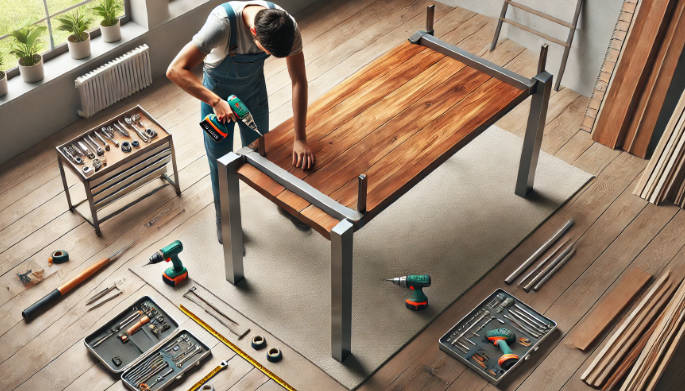
Step 3: Attaching the Legs to the Table Top
1.The next step involves securing the legs to your table top. By now, you should have four evenly cut and smoothly sanded legs ready for attachment.
2.Drill pocket holes on two adjacent sides of each leg. Apply wood glue to the top of each leg, position them at the corners of the table top, and use pocket screws to secure them firmly in place. Ensure each leg is properly aligned before allowing the assembly to dry for 24 hours.
Step 4: Installing the Apron and Additional Support Beams
1.Begin by cutting your 1×3 pine boards to fit snugly between the legs on all four sides of the table.
2.Apply wood glue to the ends of each apron piece and drill pocket holes for added stability.
3.Secure the apron pieces to the table legs using pocket screws, ensuring a tight and sturdy connection.
4.If your table is particularly large, consider adding additional support slats. Cut 3-inch furring strips and attach them to the underside of the table using 1.25-inch screws. This step is optional for smaller tables but recommended for larger ones to prevent sagging and increase stability.
Step 5: Completing Your DIY Table
1.Begin by filling all the cracks and crevices with wood filler. Pay special attention to the legs, as they may have more gaps to fill.
2.Allow the wood filler to dry completely, then sand the entire table thoroughly. This is your opportunity to smooth out every edge and surface, ensuring the table looks flawless.
3.Once the table is fully sanded, apply wood conditioner. This step is crucial as it helps the wood absorb the stain evenly, preventing blotchiness.
4.After the wood conditioner has dried, you can proceed to stain the table. Test your stain on a sanded piece of scrap wood first to ensure it’s the desired color. Refer to the supplies section for the colors used.
5.Once the stain is fully dry, apply a coat of polyurethane to seal the table. Use a foam roller for an even application and let it dry for a few days before using the table. Depending on your preference, you might want to apply multiple coats for added protection.
Conclusion
Learning how to build a dining room table can be a fulfilling endeavor that enhances your living space with a unique, handcrafted piece. By gathering the necessary materials and tools and following the instructions carefully, you’ll create a beautiful, functional piece of furniture. Don’t forget to take your time and double-check measurements to ensure a perfect fit. Now that you have the knowledge and steps to construct your own dining room table, why not start today? Share your creation and inspire others with your craftsmanship.
FAQs
What is the best wood to build a dining room table out of?
The best wood to build a dining room table depends on your preferences. Walnut offers rich, dark tones and durability, making it a popular choice. Mahogany is prized for its deep color and smooth grain, ideal for a luxurious look. Cherry wood provides a warm, reddish hue that darkens with age. Oak is known for its strength and classic appearance, suitable for a sturdy, timeless table.
How hard is it to build a table?
Building a table isn’t as difficult as you might expect. With the right tools, materials, and a good plan, even beginners can successfully construct a simple table.